Customer service

How to Rebuild Your Tomos A35 Engine
Watch the Tomos A35 rebuild video, then use the written guide below as your step-by-step workshop reference.
This guide shows you how to rebuild a Tomos A35 / A52 engine step by step. It covers disassembly, bearings, oil seals, crankcase assembly, piston fitting, clutch setup, ignition timing, primary shaft service and final assembly.
A complete Tomos A35 rebuild is one of the best ways to restore performance, stop air leaks and create a reliable base for daily riding or future tuning. If your Tomos is hard to start, smokes, leaks oil, has crankshaft play, shifts poorly, has kickstart problems or runs inconsistently, a full overhaul is often the best long-term repair.
Why rebuild a Tomos A35 engine?
The Tomos A35 is a durable two-stroke engine, but bearings wear out, seals harden and gaskets lose their sealing ability over time. That can cause air leaks, oil loss, shifting problems and reduced performance.
A proper rebuild restores crankcase compression, renews worn internal parts, improves shifting and kickstart operation, increases reliability and prepares the engine for a fresh cylinder or tuning setup.
Back to topHow a Tomos A35 engine works
The Tomos A35 is a two-stroke moped engine. The crankcase actively moves the fuel-air mixture through the engine, which means the crankshaft seals, crankcase gasket surfaces and main bearings all directly affect performance.
The A35 also uses a primary shaft system that affects clutch operation and shifting behavior. Inside that system are rollers, a roller cage, gears, bushings and the well-known question mark spring. If those parts wear or break, the engine may rattle, shift poorly or struggle to return from second gear to first gear.
This is why a Tomos A35 overhaul is not only about replacing parts. It is also about precision, cleanliness, inspection and correct assembly.
Back to topTomos A35 rebuild parts and tools checklist
Before opening the engine, prepare the replacement parts, consumables and specialist tools needed for the rebuild. This helps prevent delays, damaged hardware and rushed assembly.
The separate Tomoshop checklist includes bearings, oil seals, gaskets, primary-shaft parts, kickstart components, workshop tools and direct product links.
Prepare your Tomos A35 rebuild
View the A35 parts and tools checklist Check the recommended rebuild parts, consumables and workshop tools before opening the engine.Tomos A35 torque values
For the complete torque specification table, use the dedicated Tomoshop torque spec blog. This keeps the rebuild guide shorter and gives you one fixed place to check the latest torque values during assembly.
Need Tomos A35, A52 and A55 torque specs?
View the Tomos torque specifications Use this table when assembling the cylinder, clutch, flywheel, crankcases, covers and engine mounts.Tomos A35 engine rebuild: step-by-step
Step 1: Remove the Tomos A35 engine from the frame
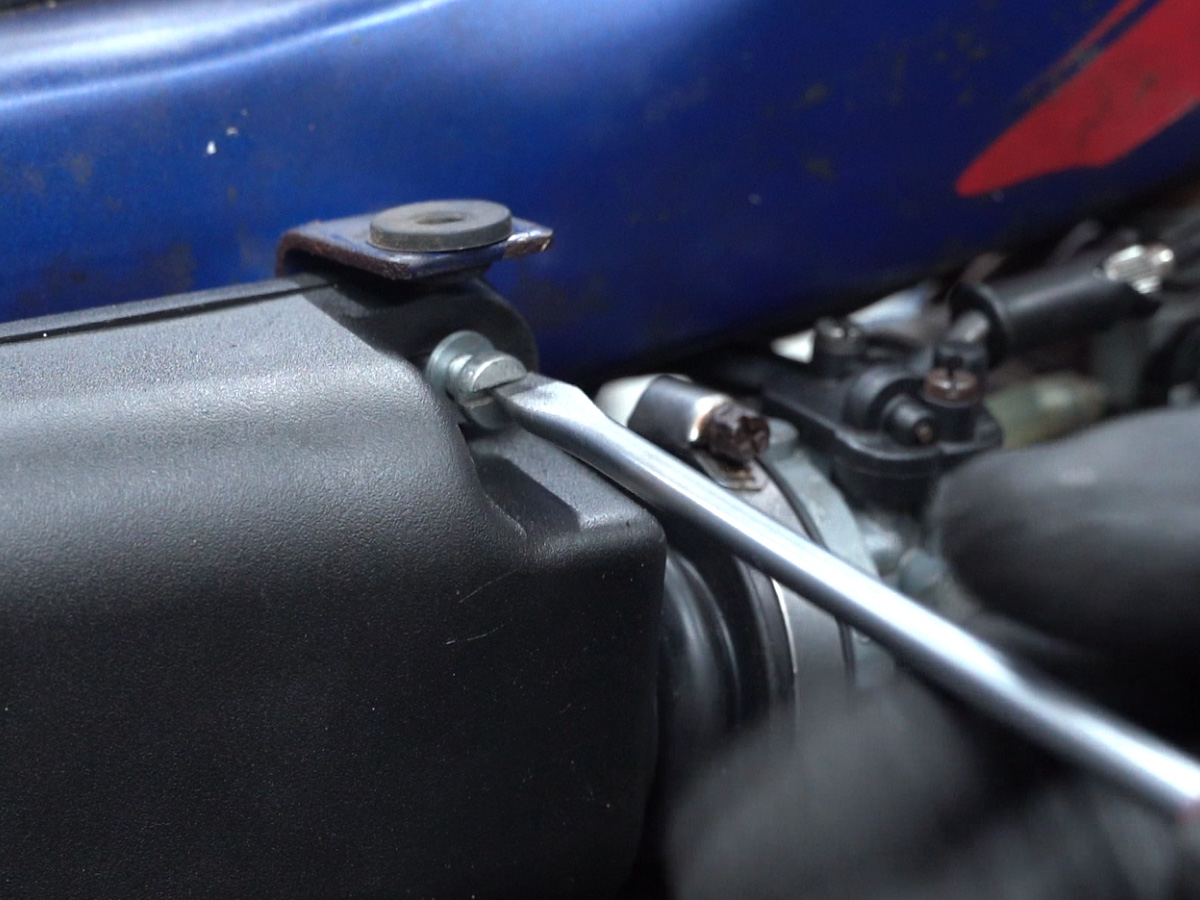
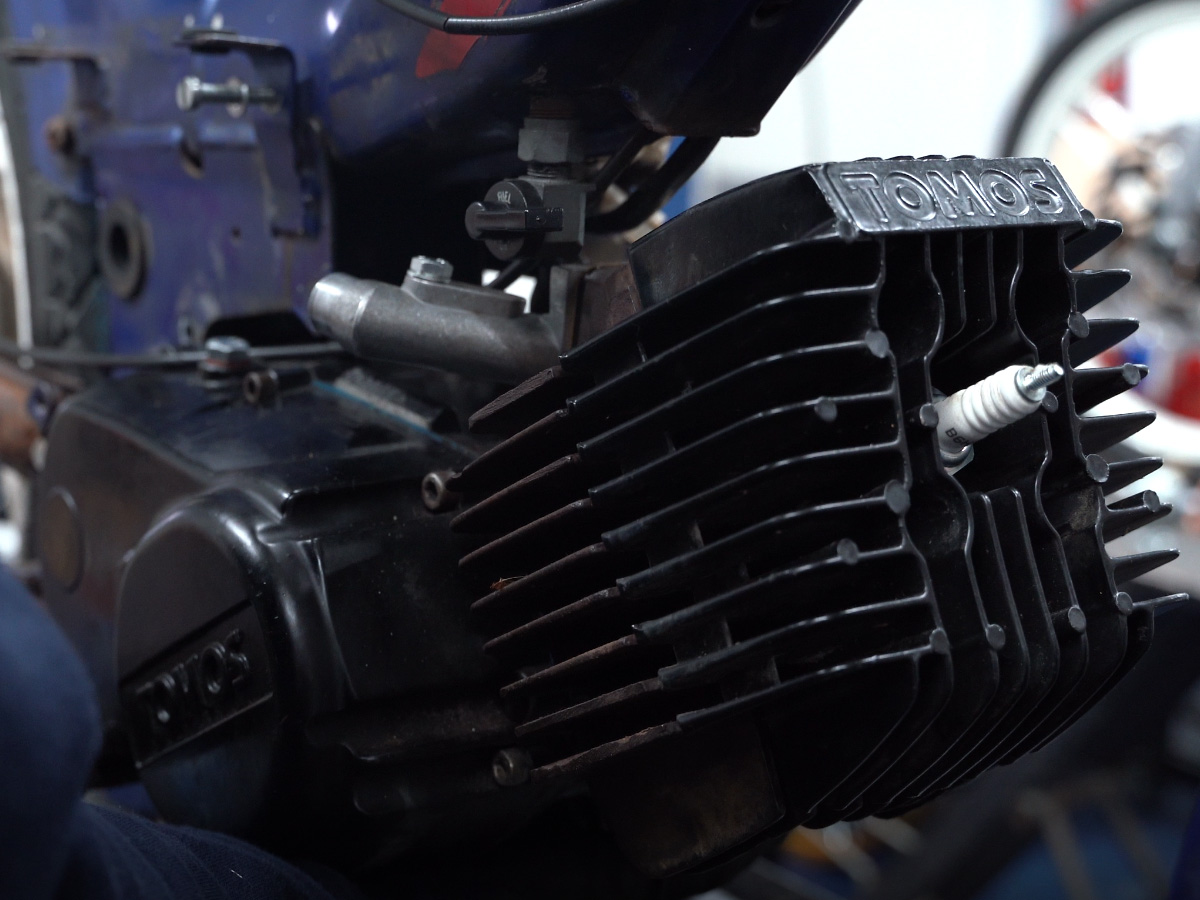
Lay out all parts in order during disassembly. Turn the fuel petcock off, remove the plastic side covers, disconnect the ignition wiring, and pull the spark plug boot off the spark plug.
Remove the airbox, disconnect the fuel line, loosen the carburetor from the manifold, remove the exhaust, disconnect the center stand spring, drain the gearbox oil, remove the chain master link, and then remove the engine mount bolts. Carefully lift the engine from the frame.
Step 2: Remove the clutch cover and clutch
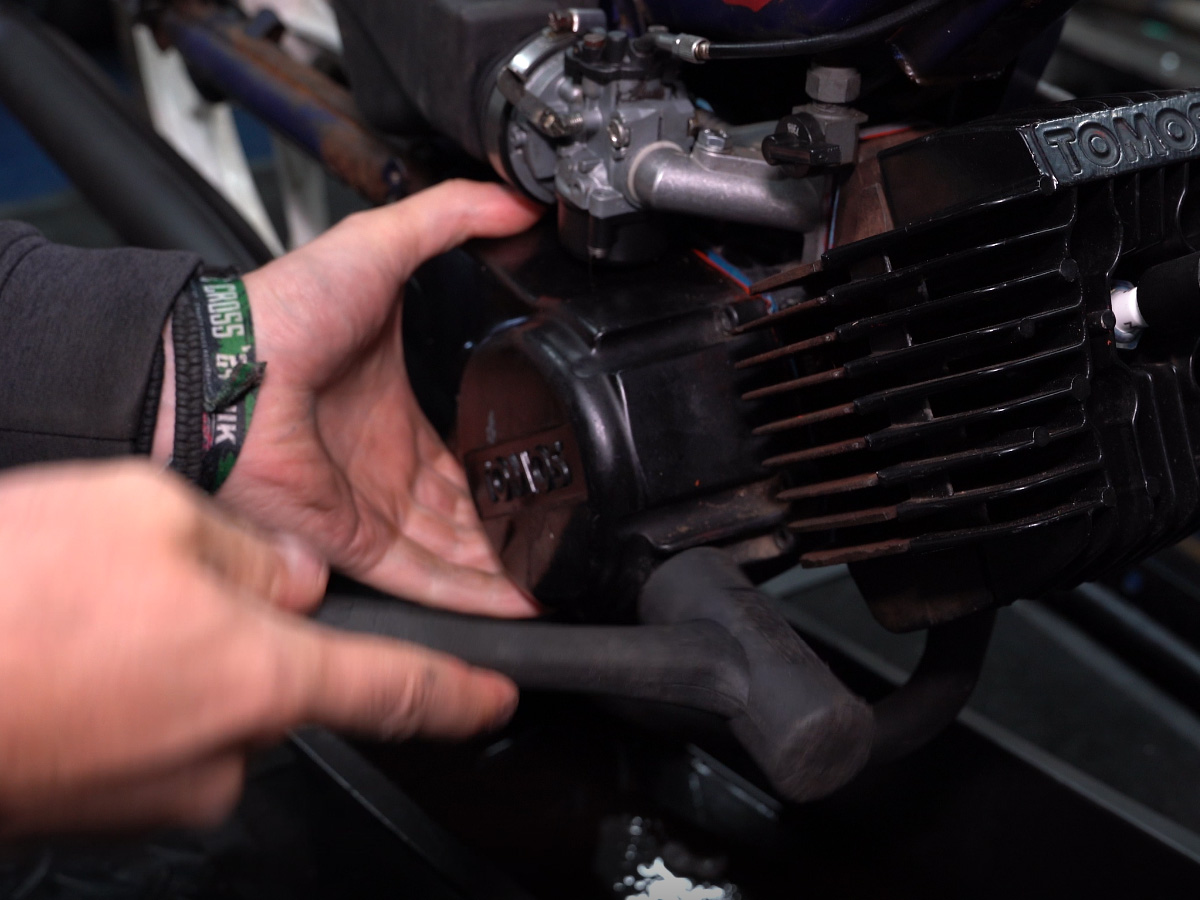
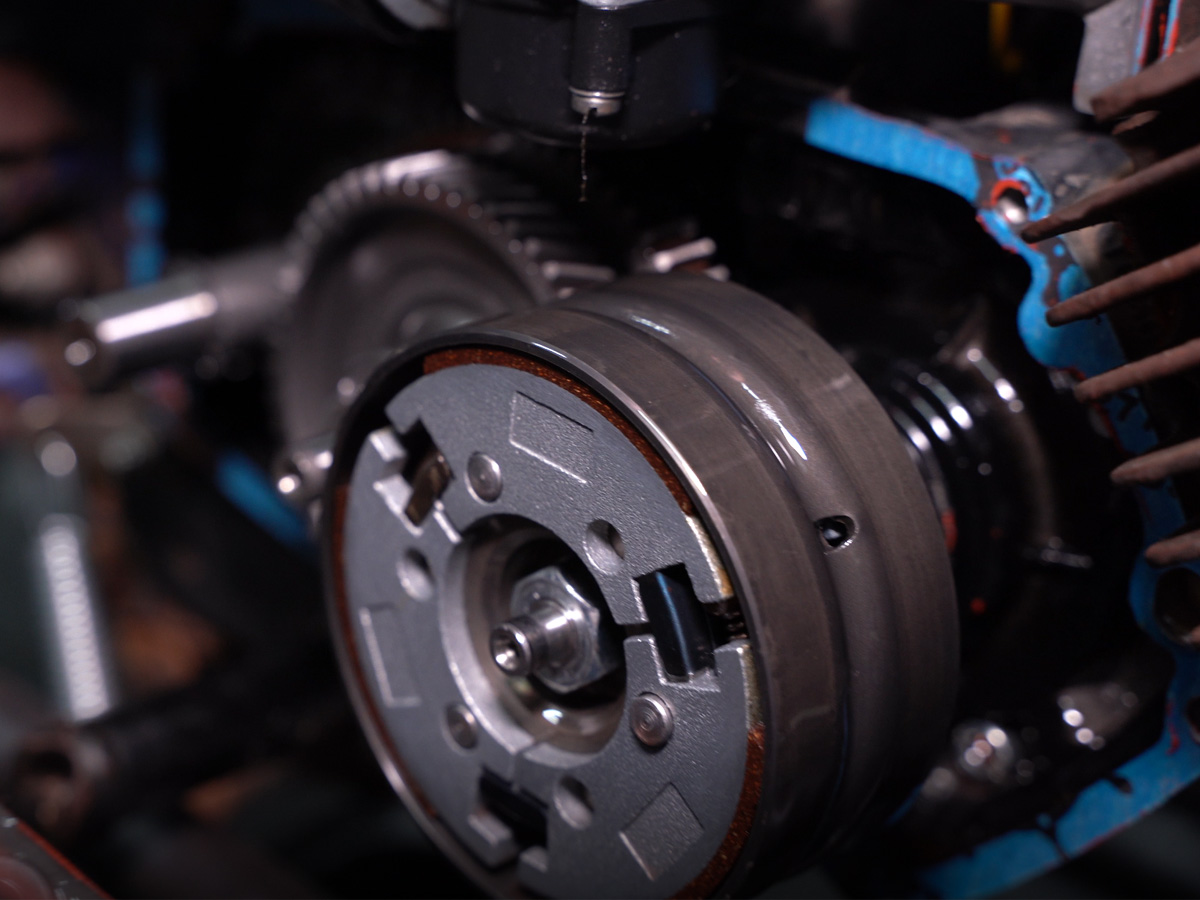
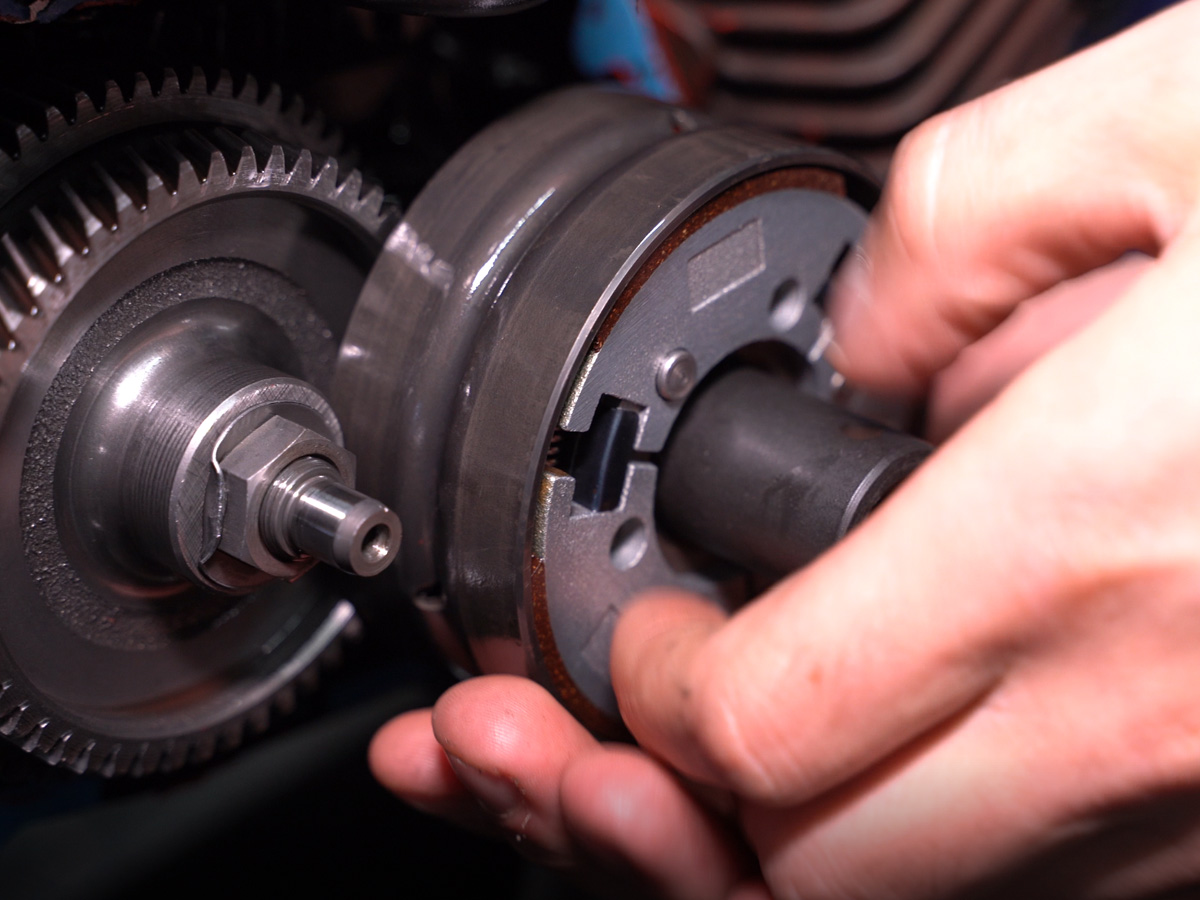
With the engine on the bench, remove the clutch side cover. A rubber mallet can help separate the cover from the housing without damaging the mating surfaces.
Keep all shims and spacers organized per shaft. Inspect for oil leaks while the cover is open. A bad clutch side seal can allow gearbox oil into the combustion side, often causing smoke and poor running.
Remove the spark plug and install a piston stop. Once the piston is secured, remove the M10 clutch nut and lift off the clutch housing and clutch assembly.
Step 3: Remove the kickstart lever, front sprocket and ignition
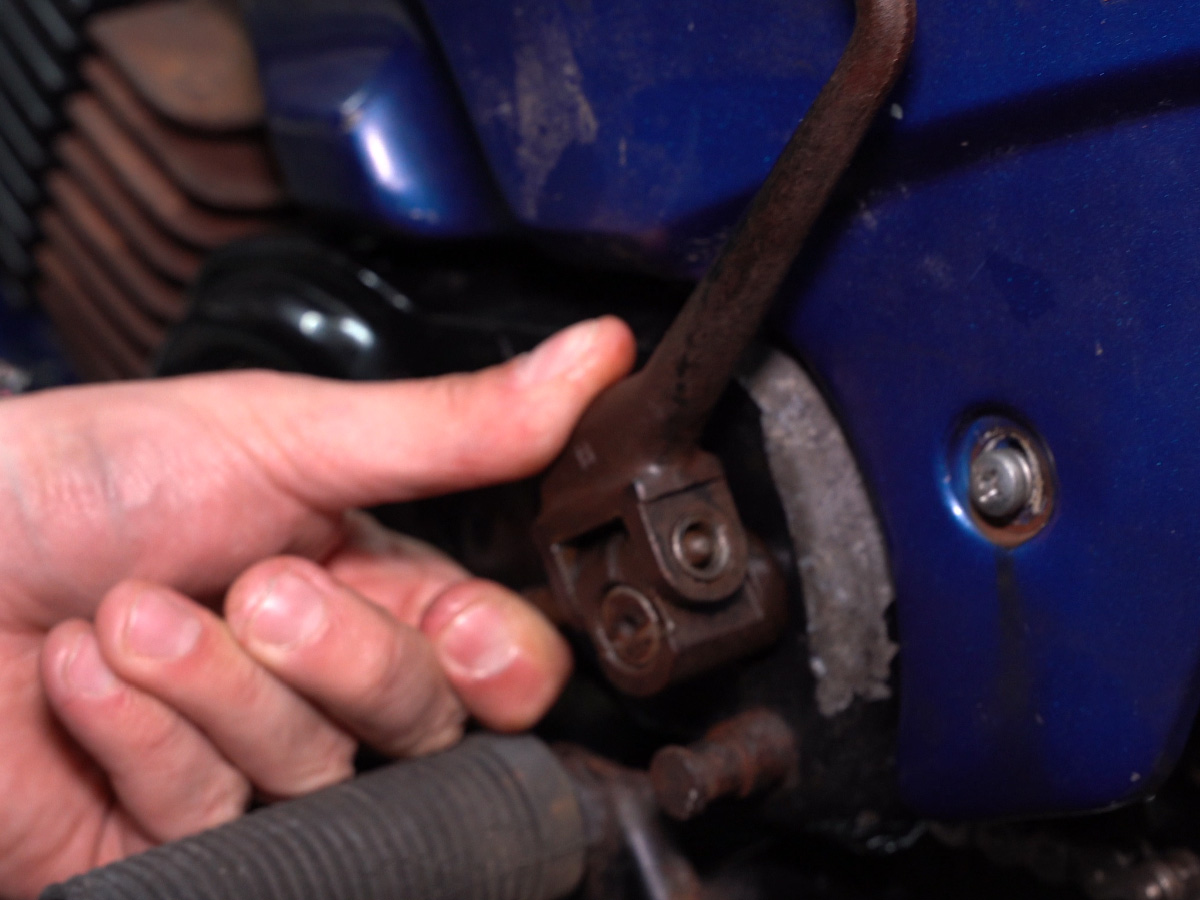
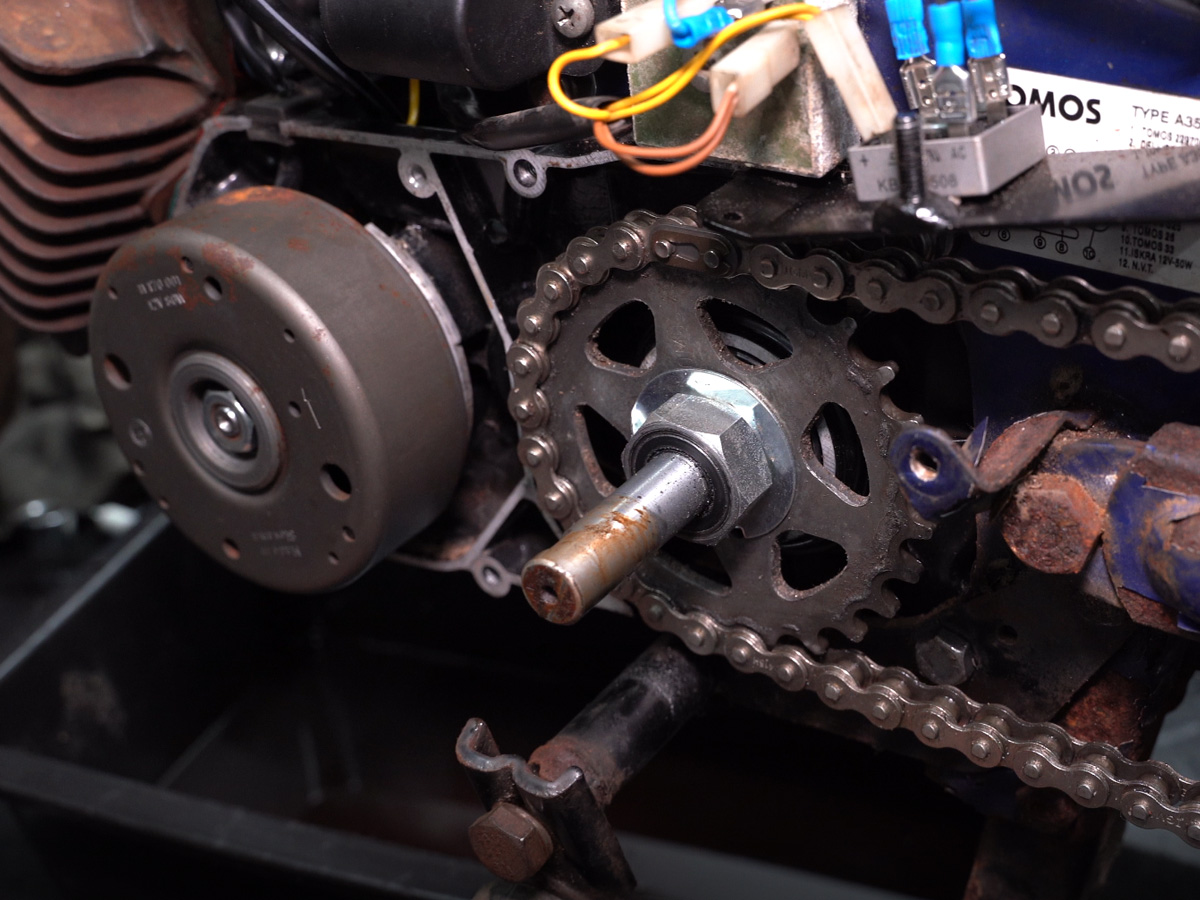
Remove the kickstart lever from the ignition side. Remove the side cover bolts so you can access the front sprocket, retaining washer and locking hardware before splitting the cases.
Inspect the output side for worn bushings, damaged sealing surfaces and loose retaining hardware. Once the kickstart lever area is disassembled, the counter shaft on the clutch side can be removed.
Before removing the ignition, note which timing mark is being used. This helps when reinstalling the original ignition later.
Step 4: Remove the manifold and cylinder
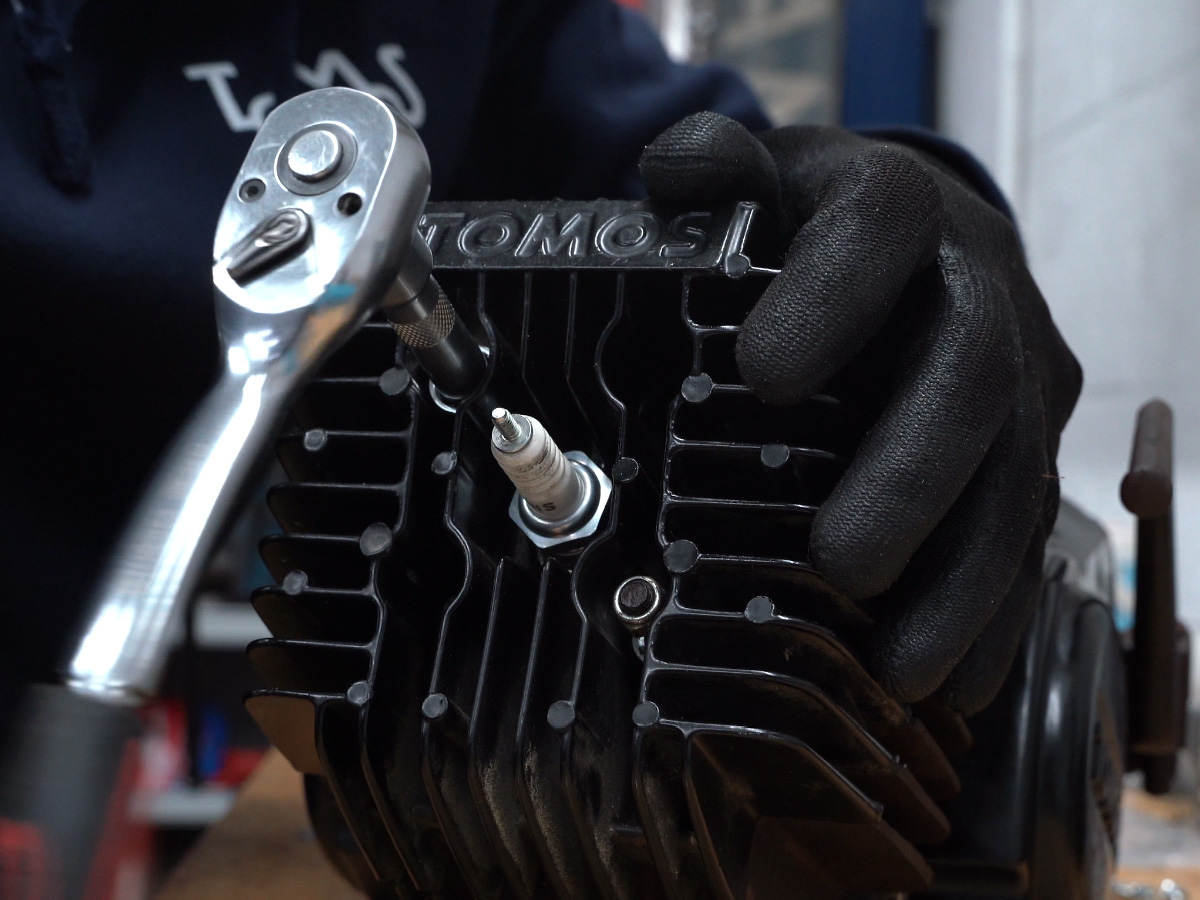
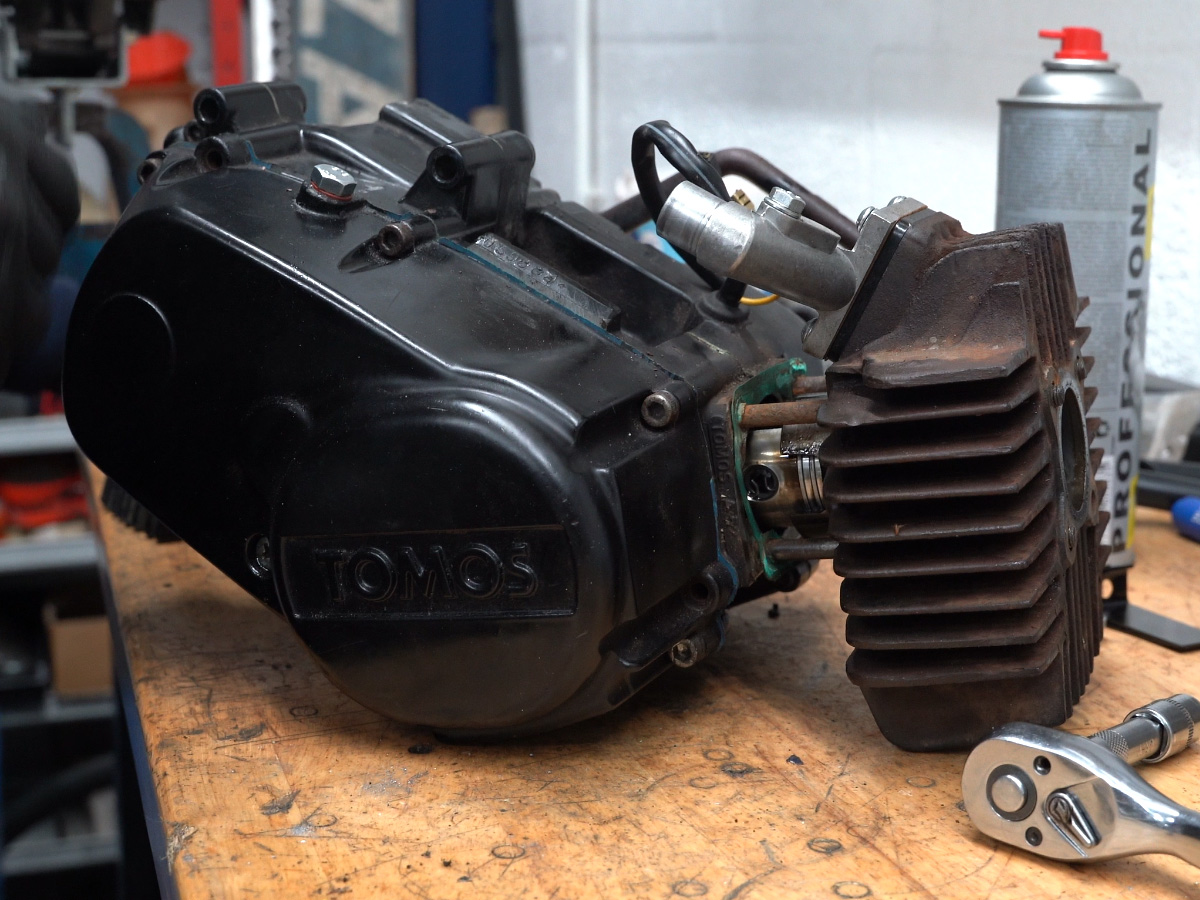
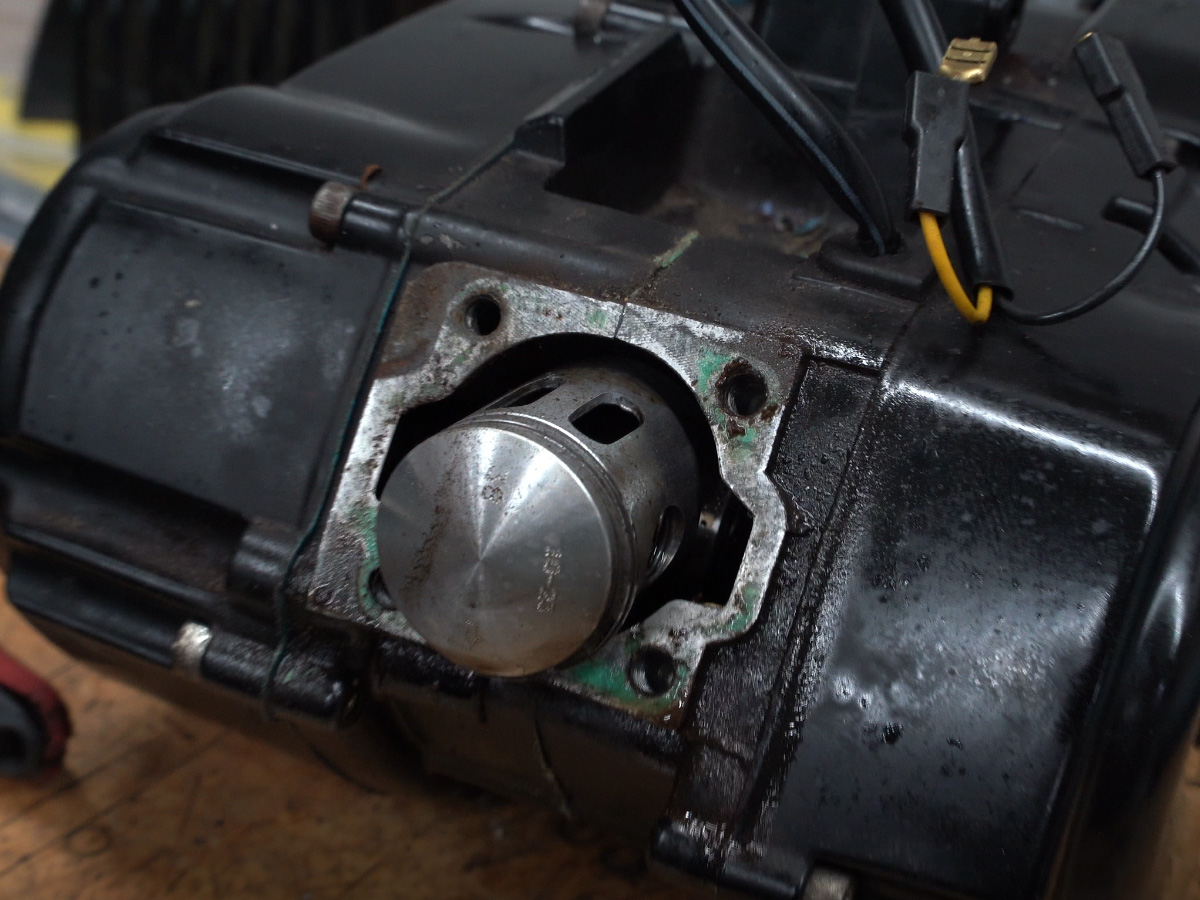
Remove the intake manifold, reed valve assembly, cylinder head and cylinder. Take care with stuck studs and old gaskets, especially on engines that have been sealed together for a long time.
Inspect the piston, piston rings, cylinder wall, carbon buildup and signs of lean running or overheating. This is also the moment to decide whether the rebuild will stay standard or support a tuned cylinder setup.
Step 5: Remove the cylinder studs
The cylinder studs can be removed with two locked nuts or with a dedicated stud removal tool. Both methods work, but the proper tool lowers the risk of damaged threads.
If you reuse the studs, clean and inspect them carefully. Replace them if the threads are damaged or if corrosion is present.
Step 6: Split the crankcases
Remove the remaining crankcase bolts, then split the Tomos A35 crankcases and remove the crankshaft. Work carefully and do not pry against the gasket surfaces in a way that can damage the cases.
Once the cases are open, inspect the main shaft, kickstart parts, roller cage, gears, bushings and question mark spring for wear, damage or contamination.
Step 7: Inspect the crankshaft for play
Check the crankshaft for vertical play. This is one of the most important inspections in the rebuild.
A small amount of horizontal movement can be normal because parts expand with heat. Vertical up-and-down play is the problem. If the crankshaft or bearings have noticeable vertical play, replace the worn parts.
For a tuned setup, decide now whether the original crankshaft is still suitable or whether a stronger or full-circle crankshaft is the better choice.
Step 8: Remove the old seals and bearings
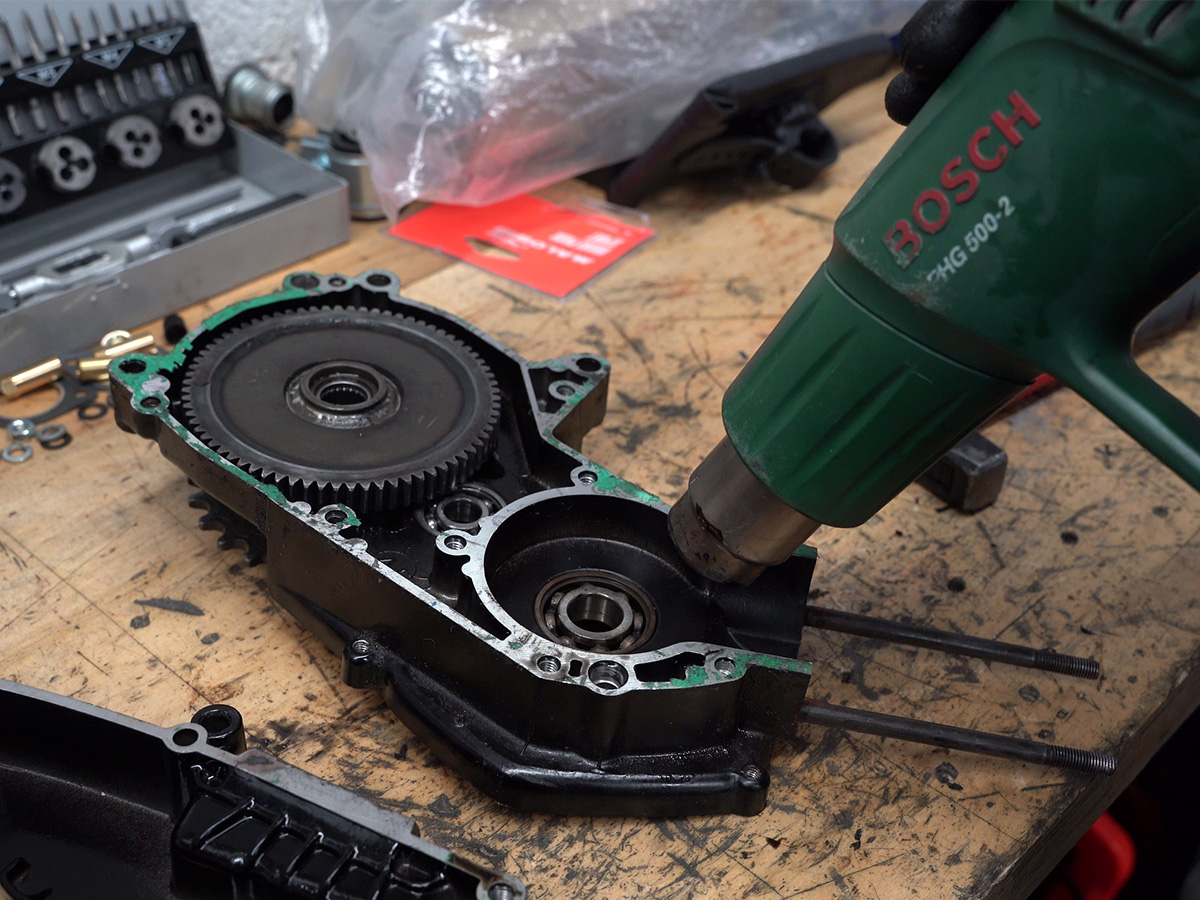
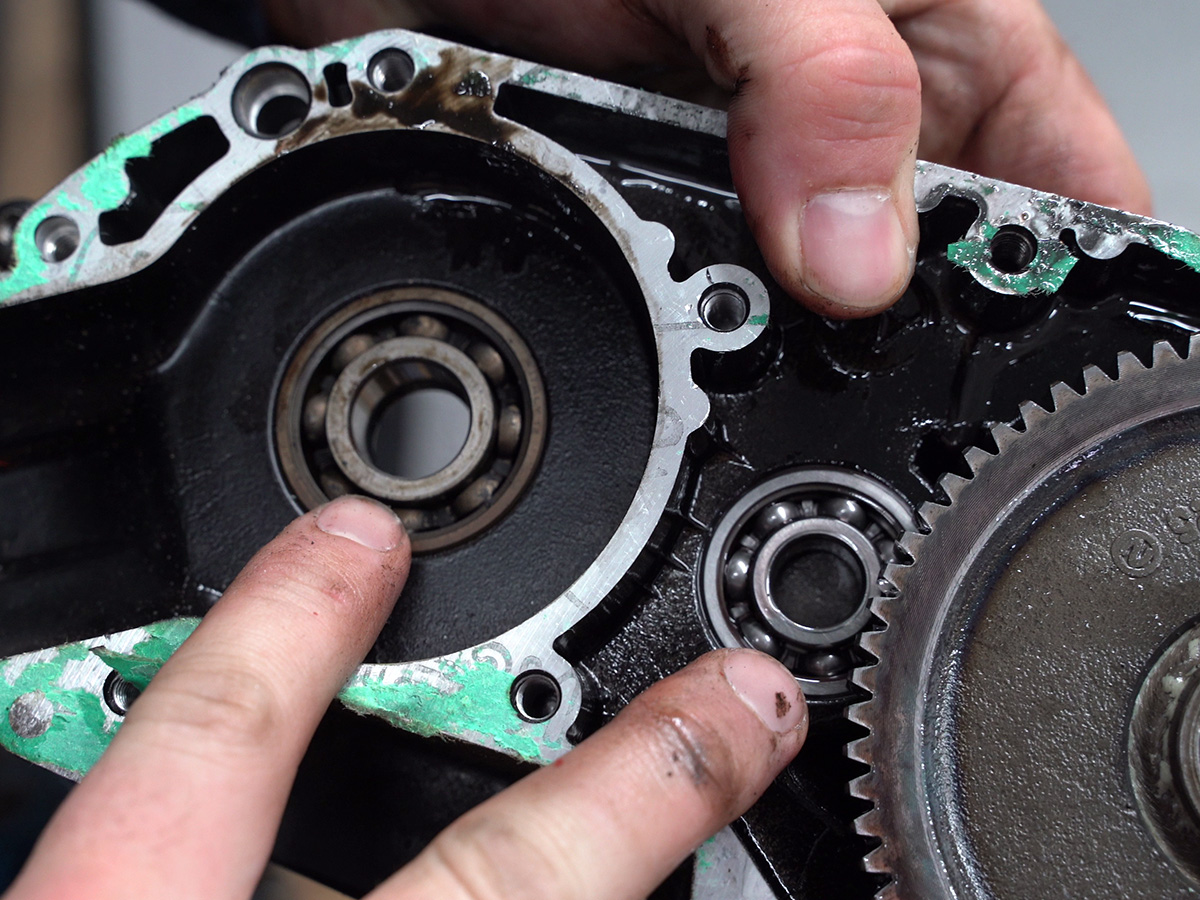
Remove the oil seals and bearings. Some bearings can be pressed out, while blind bearings may require an internal bearing puller.
Use controlled heat on the crankcase to expand the aluminum around the bearing. A heat gun is usually safer and more controlled for home workshop use than an open flame.
Do not force stuck bearings out cold. That can damage the crankcases. Once the bearings are removed, clean the empty case halves before installing new parts.
Step 9: Install the new crankshaft bearings
If the crankshaft is still in good condition, install the new crankshaft bearings onto the crankshaft. Heat the bearings first so they slide on without hammering.
Let the bearings cool naturally so they grip the crankshaft correctly. Avoid rapid temperature changes that can stress parts or shorten bearing life.
Step 10: Clean the crankcase sealing surfaces
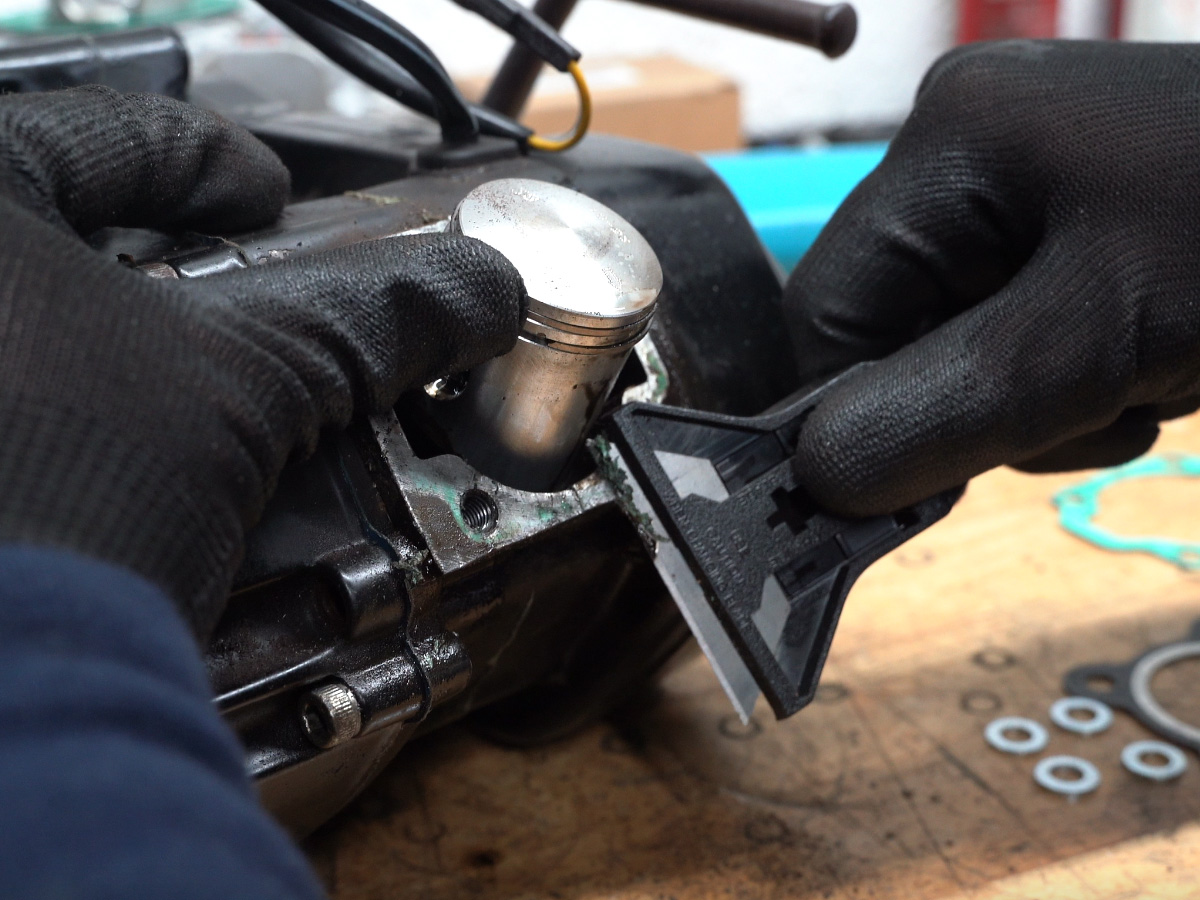
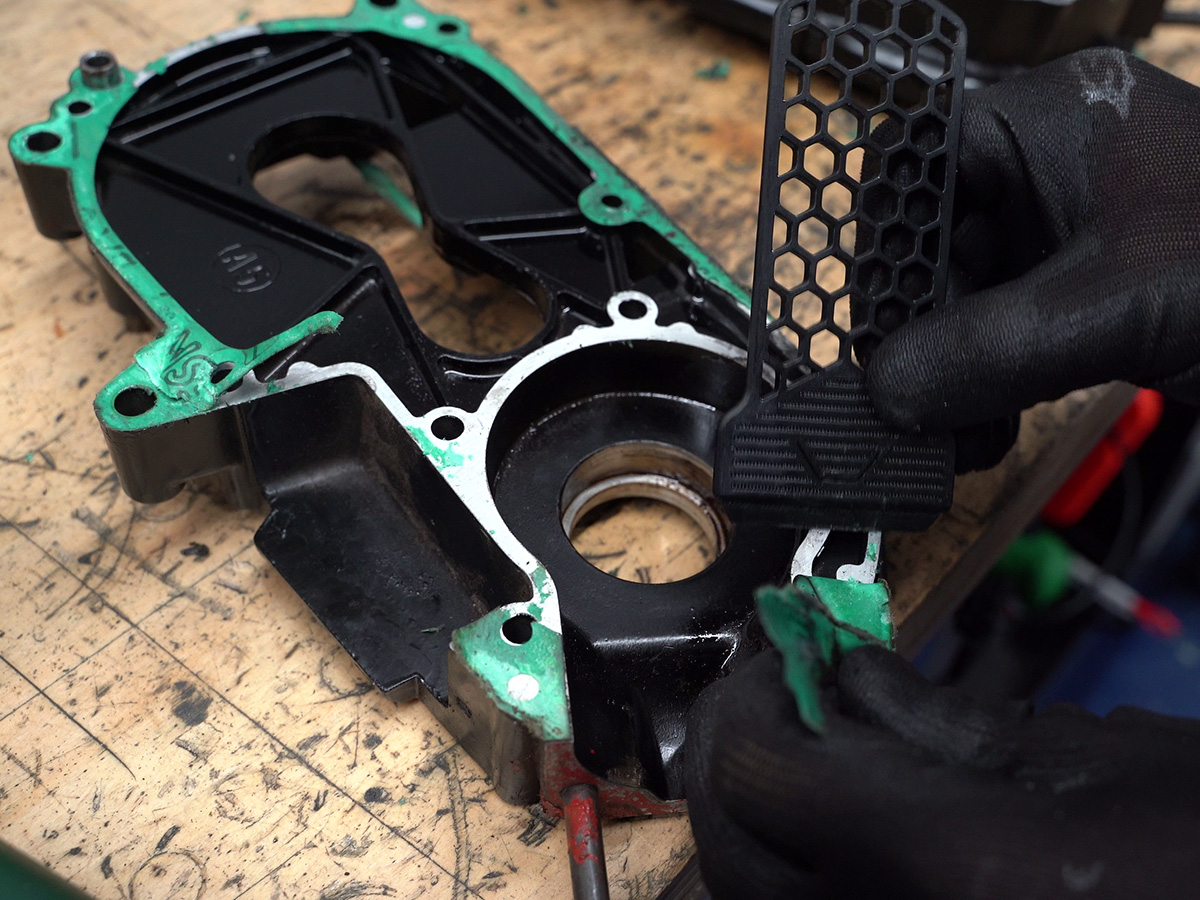
Clean the crankcase mating surfaces until they are smooth and free of old gasket material, sealant and dirt. Use a gasket scraper carefully, then finish with brake cleaner and lint-free cloths.
The Tomos A35 is sensitive to air leaks, so dirty or uneven surfaces can prevent the engine from sealing even with new gaskets. Reinstall the locating bushings so the case halves align correctly during assembly.
Step 11: Install the crankshaft into the crankcases
Heat the crankcases and carefully install the crankshaft and bearings into place. Fit the crankcase gasket and, if desired, add a very thin layer of liquid gasket as extra insurance.
Install the new needle bearings for the shafts and oil them before assembly. Pay attention to bearing orientation where applicable, especially near the output side.
Step 12: Torque the crankcase bolts correctly
Tighten the crankcase bolts evenly and crosswise so the cases pull together centrally around the crankshaft.
For the M6 crankcase bolts, use 10 Nm. Use a torque wrench. Over-tightening can strip threads or distort the cases, while under-tightening can cause leaks.
Crosswise tightening is especially important around the crankshaft area because uneven clamping can affect crankshaft alignment.
Step 13: Center the crankshaft
After tightening the cases, confirm that the crankshaft is centered and spins freely. If it is off-center, the engine may bind or the crankshaft may sit under load.
Measure the distance on both sides. A light tap with a plastic hammer can help settle the crankshaft into the correct centered position.
Step 14: Rebuild the primary shaft and question mark spring
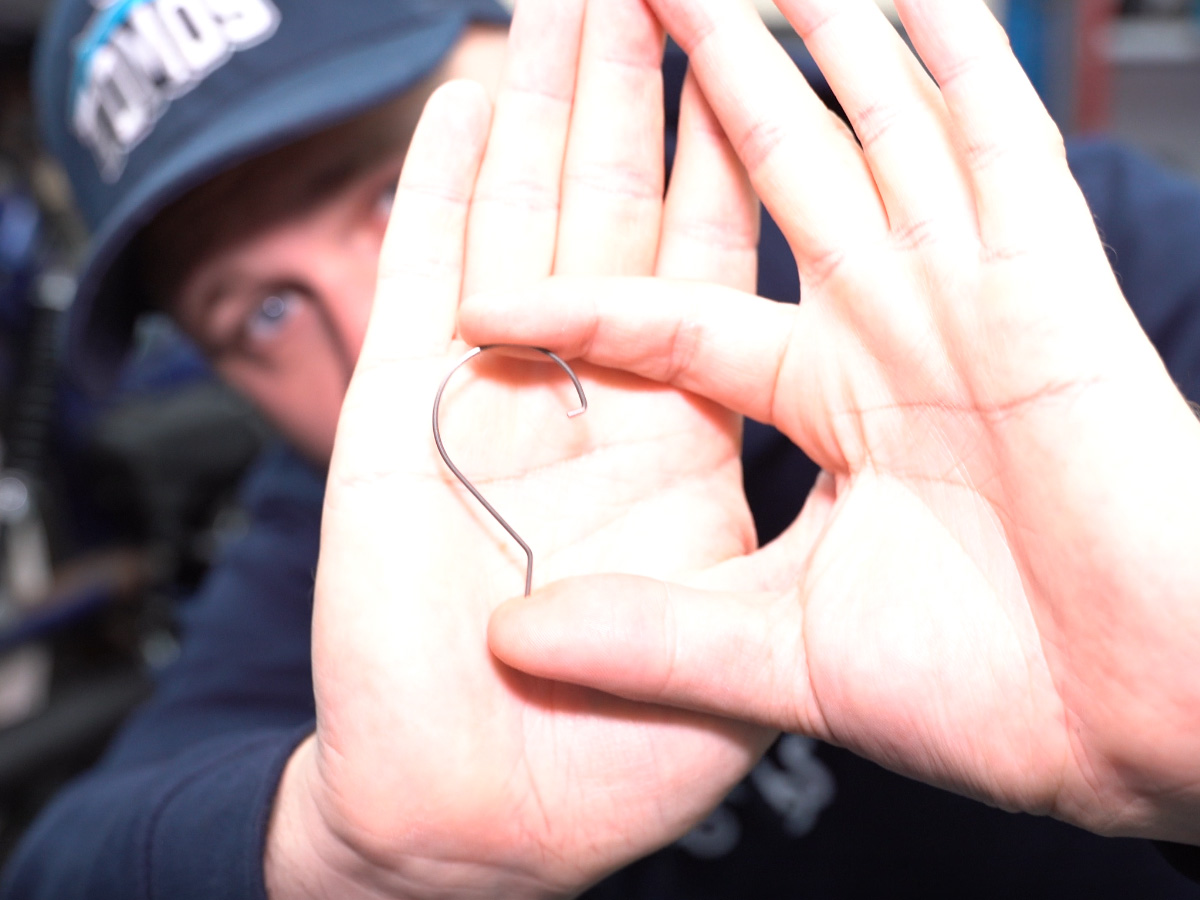
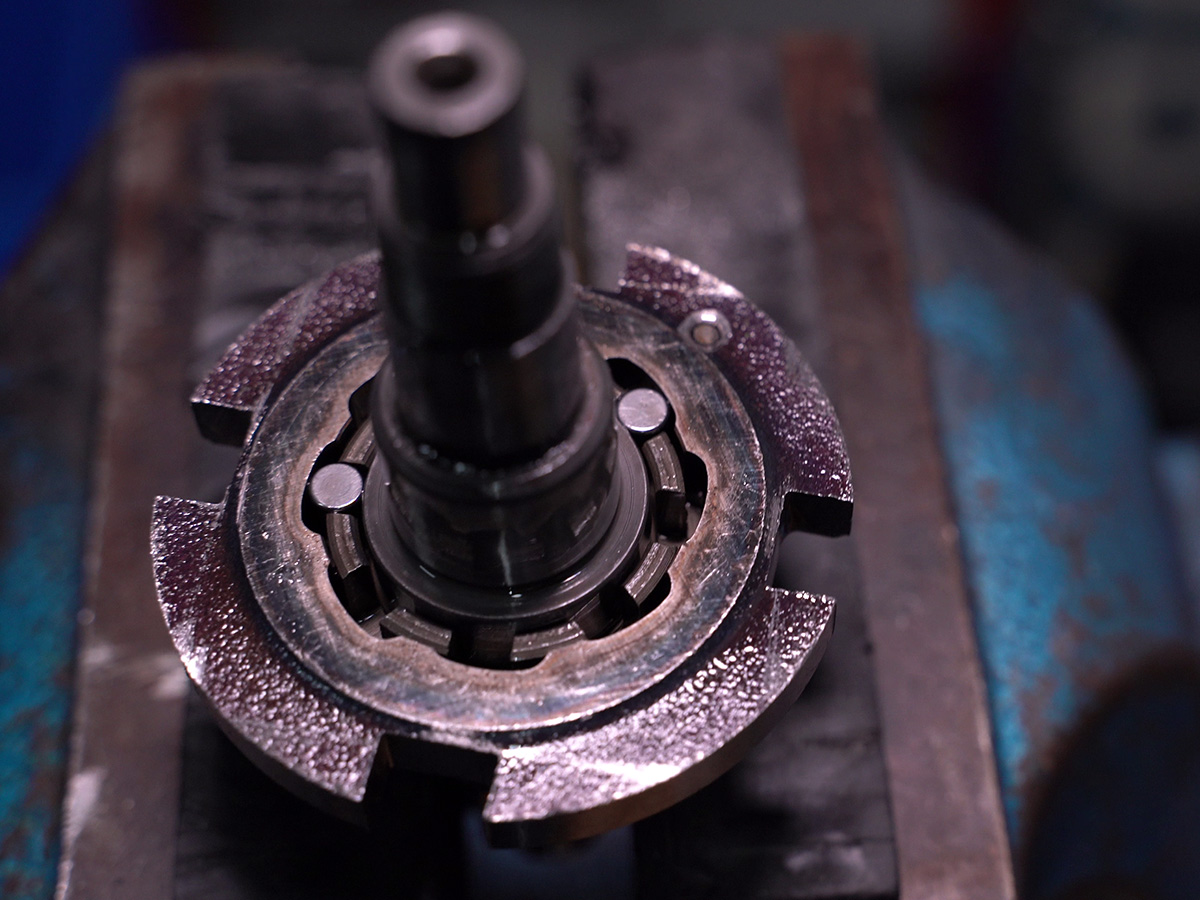
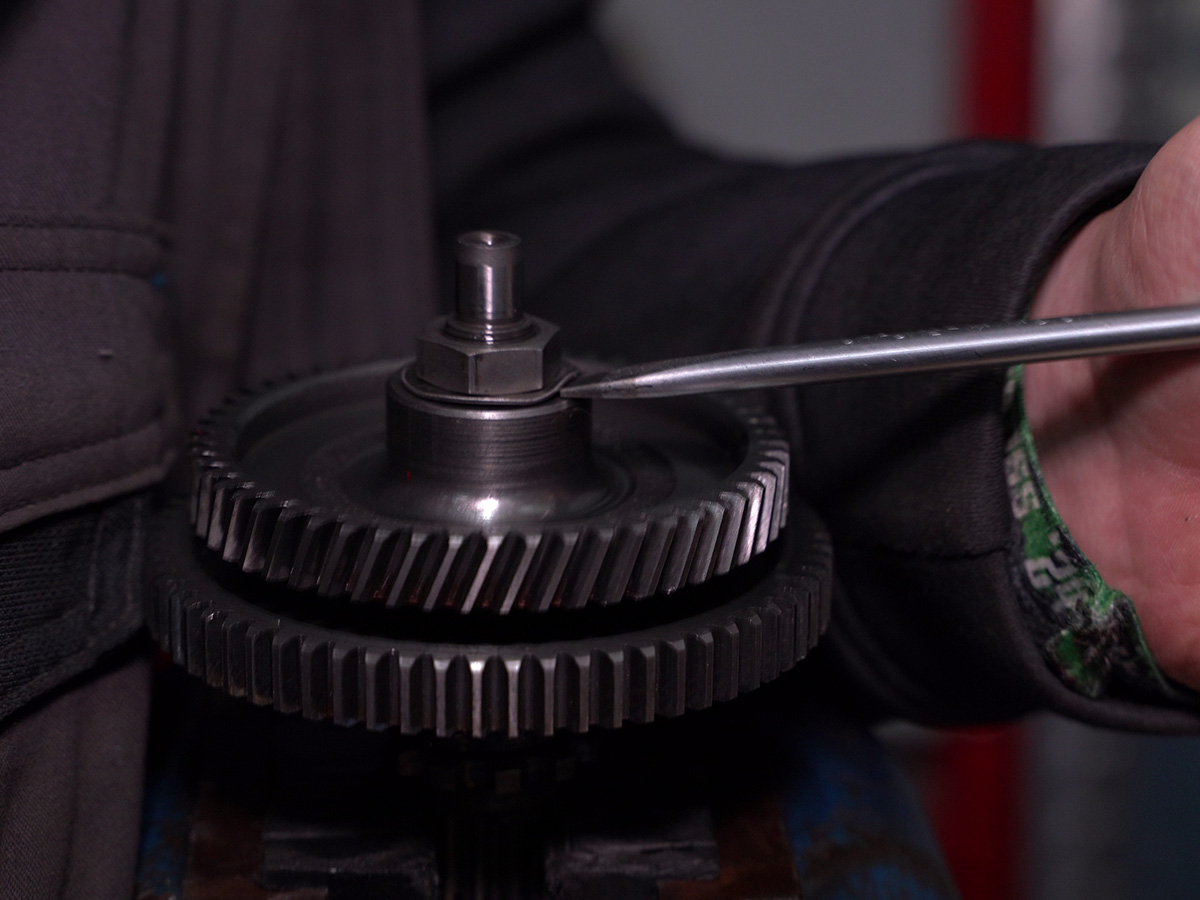
This is one of the most overlooked parts of a Tomos A35 rebuild. If the engine rattles when rolling backward, shifts poorly or struggles to return from second gear to first gear, inspect the primary shaft assembly closely.
The primary shaft system includes the question mark spring, roller cage, rollers, gears and bushings. The spring stays under tension and helps the gearbox return correctly during shifting transitions.
Inspect each roller for roundness and smoothness, check the roller cage for cracks, inspect the gear teeth for sharp edges or damage, and check the bushings for wear. Replace the question mark spring and worn roller cage parts while the engine is open.
During assembly, lightly oil the components and make sure the spring seats correctly in its locating hole. The finished assembly should have the correct small movement and spring tension.
Don't forget the question mark spring!
Shop Clutch & Primary Shaft Parts Fix hidden shifting problems before putting the engine back together.Step 15: Install new cylinder studs
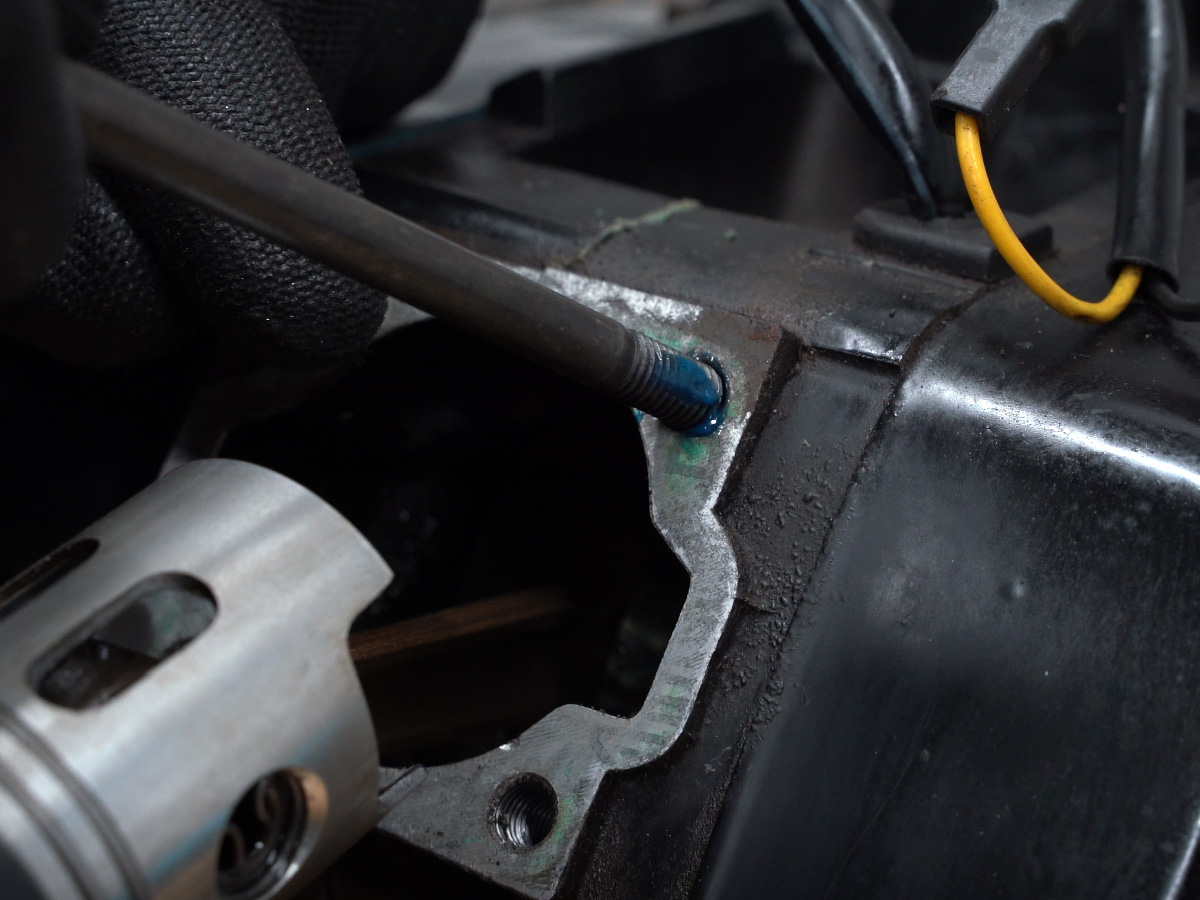
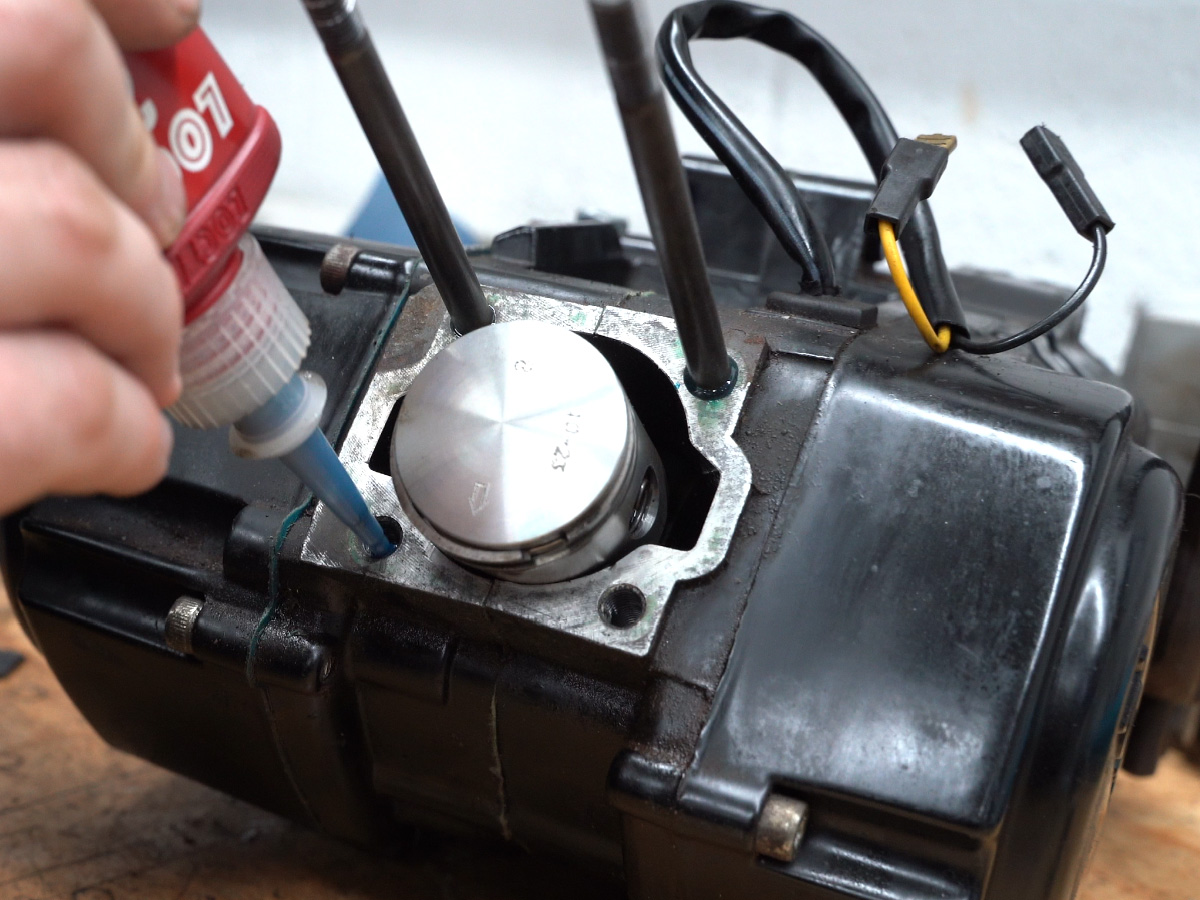
Install the cylinder studs using blue or green threadlocker. On standard studs, both ends are usually the same length, so orientation is normally not critical unless your setup differs.
Make sure the studs go in straight and seat correctly in the crankcase. The M7 cylinder stud fasteners should be torqued to 15 Nm.
Step 16: Install the piston and cylinder
Install the piston, wrist pin, needle bearing, new piston clips and cylinder. Oil the needle bearing, wrist pin, piston and cylinder before installation to prevent dry-start wear.
Place a clean cloth in the crankcase opening so nothing can fall into the engine. Check that the piston arrow points toward the exhaust port and that the ring gaps sit correctly on their locating pins.
Apply only a thin layer of liquid gasket to both sides of the gasket if you use sealant. Carefully slide the cylinder over the piston, compressing the rings with your fingers if needed. The cylinder should slide on smoothly and the piston should move freely.
Step 17: Torque the cylinder head
Install the head gasket and cylinder head, then tighten the head fasteners in a cross pattern.
For the M7 cylinder head fasteners, use 12 Nm. Crosswise tightening helps the head seal evenly and reduces the chance of leaks or warping.
Step 18: Install the crankshaft oil seals
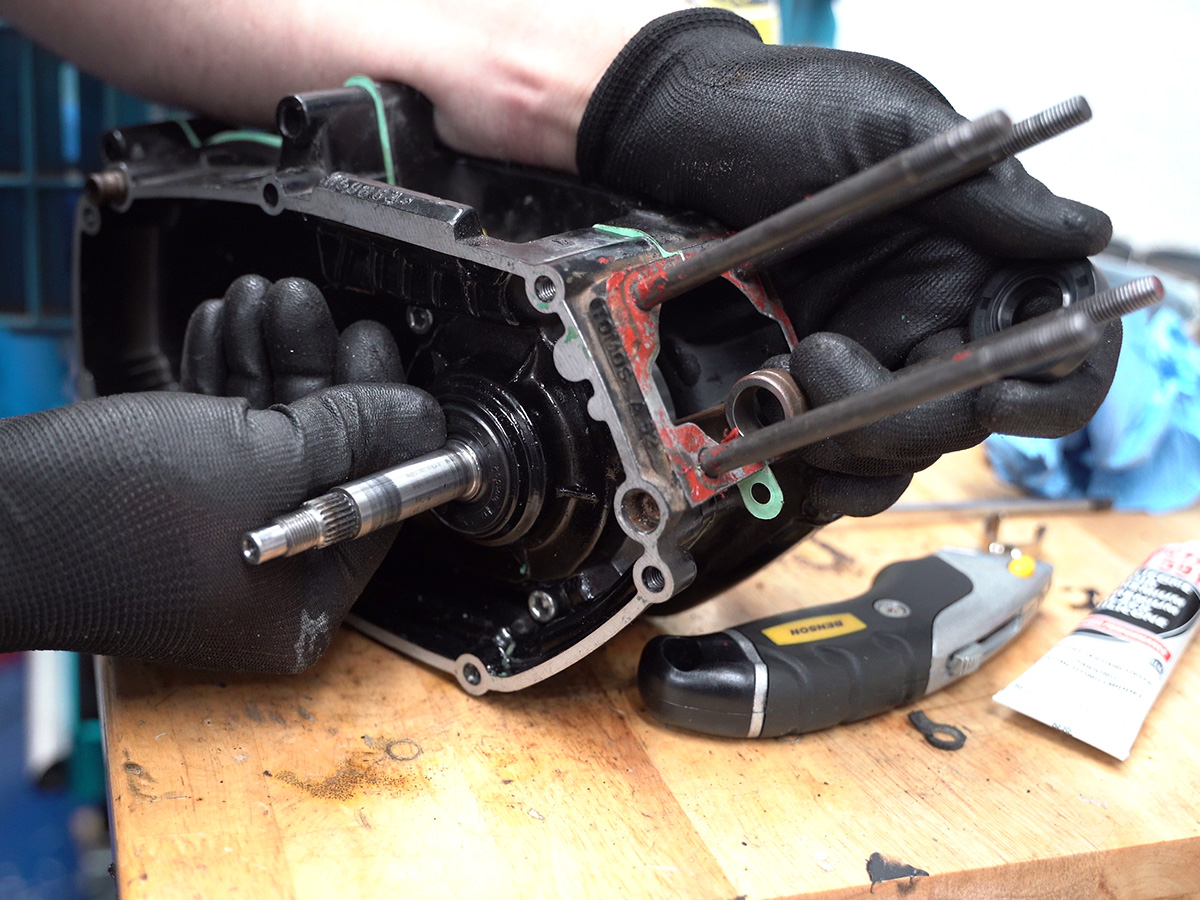
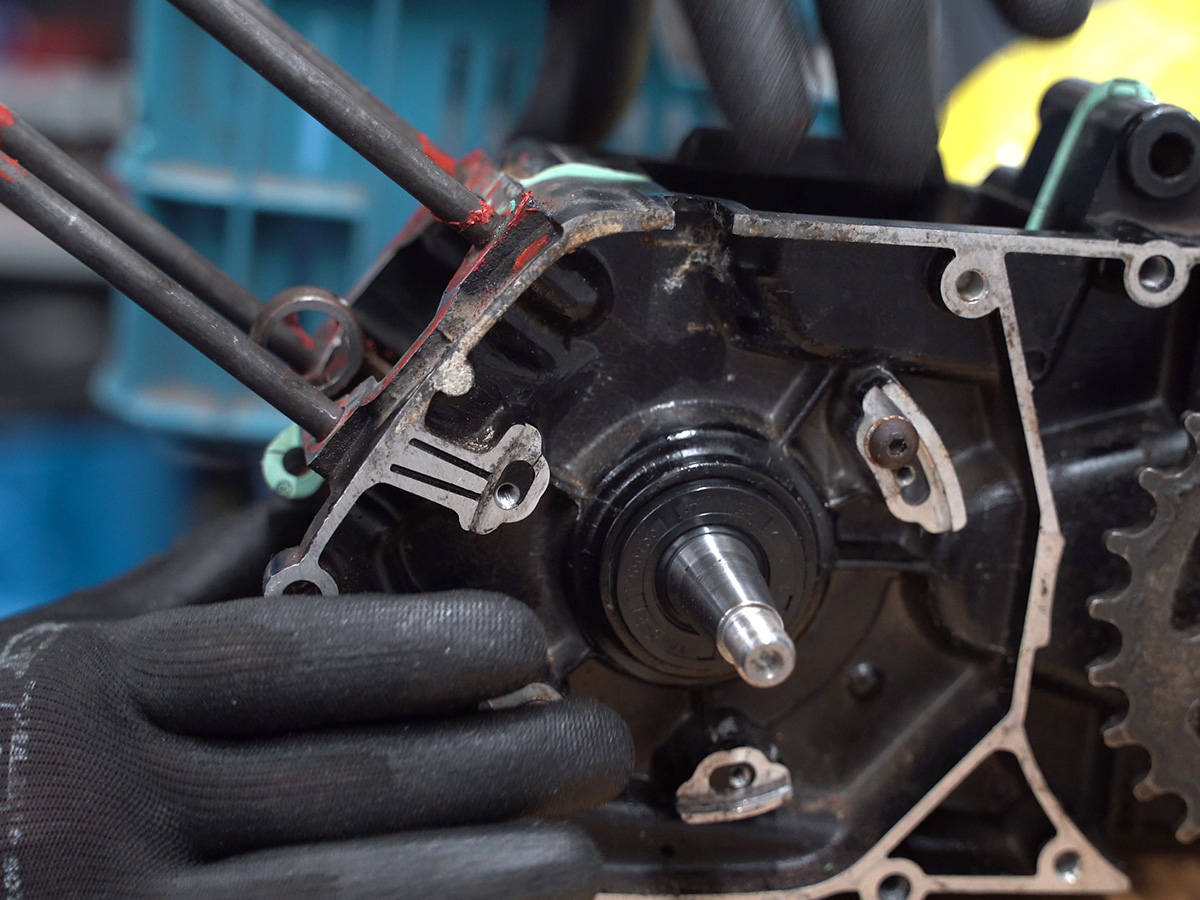
The Tomos A35 uses multiple oil seals, and installation direction matters. The simple rule is that the spring side of the seal faces the side you want to seal.
On the ignition side, the spring should face the crankcase. On the clutch side, the seal must keep the fuel-air mixture in the crankcase while preventing transmission oil from reaching the combustion chamber.
Lubricate the seals lightly and press them in straight. Do not install them too deep. They should sit flush unless the specific seal position requires another depth. If a seal sits too deep, the retaining washer may not seal correctly and oil leaks can remain.
Step 19: Assemble the main shaft and kickstart parts
Reinstall the gearbox shaft assembly and kickstart components carefully as a complete set where possible.
Pay special attention to the semicircular kickstart spring inside the crankcase. If it is not seated correctly, the kickstart can spin, fail to engage or make strange noises.
Make sure the shaft passes cleanly through the needle bearings and everything aligns before closing the side cover. If the mechanism does not catch correctly during testing, correct it now.
Step 20: Assemble the clutch housing
Install the clutch housing, washers and spacers in the correct order. The Tomos A35 uses different shim thicknesses, so check what your engine needs.
A spacer washer behind the clutch housing helps align the gears correctly. Incorrect spacing can cause poor transmission and clutch gear alignment.
If you are upgrading the clutch, this is the stage to install a sport clutch or stronger springs. With the cylinder installed, use a piston stop to torque the clutch nut. For the M10 clutch nut, use 25 Nm.
Step 21: Install the clutch cover and cover bearings
Use heat on the clutch cover to warm the bearing locations. Move the bearings into place with suitable pliers or a proper bearing tool. They should slide in with heat, although light force may still be needed.
Apply the gasket and, if desired, a very thin layer of liquid gasket. Allow sealant to cure before adding oil or starting the engine.
Pay attention to the kickstart shaft shim arrangement. One example setup uses a 1 mm shim and a 0.5 mm shim, but your engine may need different spacing.
Start the cover straight on the locating bushings, then tighten the M6 clutch cover bolts gradually and crosswise to 7 Nm. Note that one bolt is longer than the others and belongs in the upper-right position near the engine mount.
Step 22: Install the reed valve and manifold with new gaskets
Reinstall the reed valve and intake manifold using fresh gaskets. Thick, good-quality gaskets improve sealing and reduce intake-side air leak problems.
Tighten the manifold evenly and crosswise so it sits straight against the engine. Do not reuse damaged gaskets because this area is a common source of false air on Tomos engines.
Step 23: Install the ignition and set the timing
Clean the flywheel magnets and ignition components before assembly. Dirt, rust or buildup can interfere with reliable spark generation.
If brake cleaner is not enough, use light sandpaper to freshen the magnetic surfaces. For a standard Tomos A35 setup, use the timing marks on the baseplate to align the ignition. If you reuse the original ignition, transferring the old timing position can make setup easier.
Do not lose the flywheel woodruff key. It is small, easy to misplace and essential for correct flywheel alignment. Use a piston stop to hold the engine when tightening the M10x1 flywheel nut to 30 Nm. Reinstall the flywheel cover and tighten the M6 cover bolts to 6 Nm.
Step 24: Install the front sprocket with a new nut
Install the front sprocket with a new retaining washer and a new locking nut. Tighten the M22 main axle / front sprocket nut to 60 Nm. A nut with an integrated sealing feature adds extra protection against oil leaks in this area.
Front sprocket oil leaks usually come from a worn output seal, worn bushing or seepage around the sprocket nut. After tightening to spec, bend the locking washer tabs into place and reinstall the ignition side cover.
Step 25: Assemble the kickstart and refill the ATF
Install the kickstart spring, pin, clip and kickstart lever hardware carefully. Lightly grease the moving parts so the mechanism moves smoothly between positions.
Make sure the kickstart hook and spring are positioned correctly. If installed incorrectly, the kickstart will not return or engage as it should.
Tighten the kickstart fastener correctly, confirm the mechanism operates smoothly, reinstall the spark plug at 18 Nm, and then refill the engine case with 250 ml of ATF. When reinstalling the engine into the frame, tighten the M8x1 engine frame bolts to 25 Nm.
Back to topFinal checks before starting your rebuilt Tomos A35 engine
- Torque values are checked against the Tomos torque table
- Crankshaft spins freely
- Oil seals sit flush
- Gaskets are seated properly
- Kickstart works correctly
- Clutch is assembled in the correct order
- Ignition timing is set and the flywheel nut is torqued to 30 Nm
- Clutch nut is torqued to 25 Nm
- Main axle / front sprocket nut is torqued to 60 Nm and locked
- Clutch cover bolts and flywheel cover bolts are torqued where applicable
- Spark plug is reinstalled at 18 Nm
- Engine frame bolts are torqued to 25 Nm if the engine is back in the frame
- No tools or loose parts remain inside the engine
- Sealant has had enough time to cure
- Gearbox oil / ATF is filled before running
- Primary shaft engages and shifts correctly
A careful first inspection can save you from opening the engine again.
Back to topCommon mistakes when rebuilding a Tomos A35 engine
- Hammering bearings into cold cases
- Not cleaning gasket surfaces properly
- Reusing old piston clips
- Installing oil seals backwards
- Forgetting shims or spacers
- Not centering the crankshaft
- Not checking the question mark spring and roller cage
- Misaligning kickstart parts
- Not using a torque wrench
- Using too much liquid gasket
- Losing the flywheel woodruff key
- Rushing final assembly
Conclusion
A Tomos A35 engine rebuild is detailed, but it is manageable when you work step by step with the correct parts, clean working methods and proper torque values. Replacing bearings, seals, gaskets and worn hardware restores reliability and gives your Tomos a strong mechanical base for standard or tuned setups.
A complete rebuild also gives you the chance to inspect the primary shaft, replace the question mark spring, adjust the clutches and correct hidden shifting problems before they get worse. A properly rebuilt Tomos A35 should seal well, shift and kickstart correctly, and run far better than a tired original block.
Ready to get your Tomos back on the road?
Browse All Tomos Parts Everything you need for standard repairs or tuning setups.FAQ: Tomos A35 engine rebuild
How do I know if my Tomos A35 needs new crankshaft seals?
Common signs include smoking, poor running, oil leaks, hard starting and an inconsistent idle.
Can I reuse old bearings in a Tomos A35 rebuild?
No. If you are opening the engine, it is best to replace the main bearings and seals.
Why is my Tomos A35 leaking oil near the front sprocket?
The leak may come from the output seal, a worn bushing or seepage around the front sprocket nut.
Should I use liquid gasket on a Tomos A35 engine?
A very thin layer can help on properly cleaned surfaces. Do not use too much, because excess sealant can squeeze into places where it does not belong.
Why does my Tomos A35 kickstart slip after assembly?
The kickstart spring or internal engagement parts may be installed incorrectly. Stop and correct the mechanism before final assembly.
What does the Tomos question mark spring do?
The question mark spring helps the primary shaft and shifting system return correctly during gear changes. If it breaks or loses tension, the engine may rattle, click or shift poorly.
What torque should I use on a Tomos A35 engine?
Use the dedicated Tomos A35, A52 and A55 torque specification table for the full list of values for the spark plug, cylinder head, cylinder studs, flywheel, clutch, crankcases, covers, engine mounts and front sprocket nut.